
Mark making with rust
Apr 30, 2021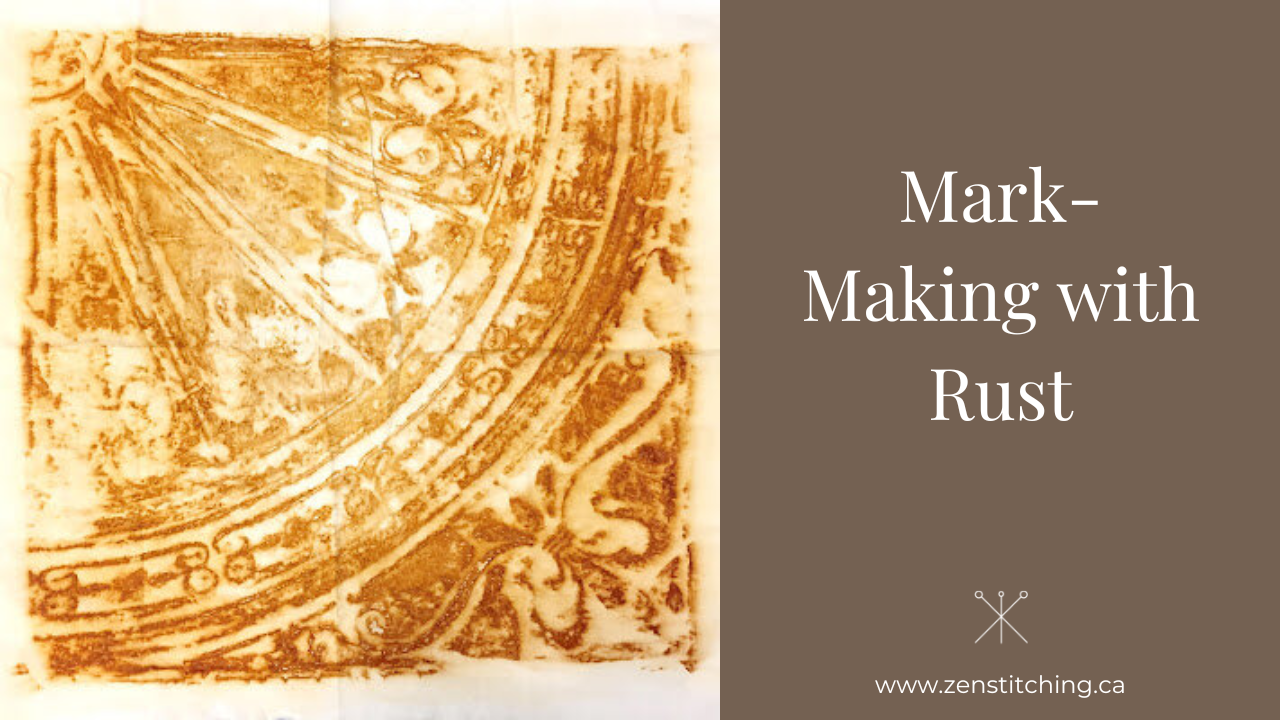
How Does It Work?
The rust-dyeing process is extremely simple. When a rusty object is in contact with fabric, fibre or paper, it leaves an imprint. Place your rusty items on fabric, wet it with water and vinegar to hasten the oxidisation (rusting) process, and leave the fabric and rusty item together until we are satisfied with the colour or pattern. Then remove the item, and wash the fabric. The whole process takes only a few days and requires little effort.
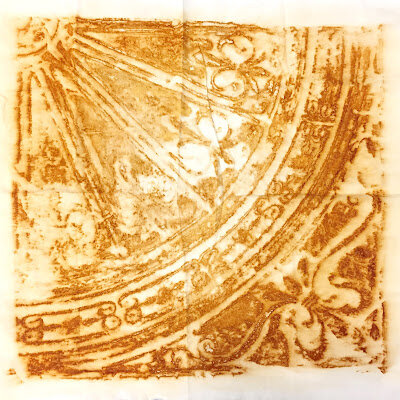
Delightful rust pattern using an old iron ceiling tile.
Equipment
-
Fabric - cotton and silk are the best fabrics for dyeing. Wool fabric will take dye, but the rust tends to colour it a bit harshly; a wool/cotton blend can be a better choice, if that works for your project.
-
Plastic kitchen gloves
-
Spray bottle filled with a mixture of 50 percent water and 50 percent vinegar
-
Plastic bags or wrap (optional)
-
Plastic bin, box or tray
-
Rusty items which can be used over, and over, and over again.
-
You can even rust non-rusty iron items. To aid the rusting process place in a shallow pan with a bit of salt, water, and vinegar, and in a few weeks, it was fabulously rusty and ready for dyeing.
Method
Cover your working surface with plastic bags or wrap. Rust will also dye your clothes, so wear old clothes that you don’t mind staining.
Lightly spray your fabric with the vinegar/water mixture.
Place your rusty items on the fabric in any pattern you like.
Place another piece of fabric on top.
Keep your fabric slightly moist for the next few days; this will help the rust designs to develop. (Tip: Weight down the fabric with small items such as rocks or bottles if you want to make your imprint clearer.)
Lightly spray your fabric with the vinegar/water mixture (1:1 ratio). You can add extra vinegar at any time, to help speed the dyeing process.
Now, wrap loosely with a plastic bag to keep the fabric moist, which hastens the dyeing process, but you also want to make sure air can reach the fabric as well. Oxygen is necessary for the rust to develop.
Length of the Dyeing Process
Check your fabric once a day or so; make sure it’s damp, and see how the colour is developing.
For light colours and delicate fabrics like silk, you may only want to leave your dyeing project for one day.
For very dark intense colour, you might leave it for 4 or 5 days.
*If left too long, the rust can eventually damage the fabric, especially if it is thin or delicate. However, if you check your fabric every day or so, you should not have any problems.
I find that the rust-dye develops more quickly in warmer environments; I especially love rust-dyeing outdoors in the summer, as it goes very quickly.
Finishing Your Dyeing Process
When you are satisfied with the colour and patterning of your fabric, remove the rusty items and keep them for use in your next project.
Next, immerse the fabric in a light saline solution; this completely stops the rusting process and neutralizes the fabric. For the solution, I use about one tablespoon of salt in 4 litres of water.
Then wash the fabric as normal – if it’s silk or wool, hand wash with dishwashing liquid and rinse thoroughly. If it’s a cotton or synthetic, you may machine wash and dry as normal.

