
Sashiko 101: Getting Started
Oct 25, 2026
Have you been drawn in by the beautiful photos of Sashiko stitching you've seen online? The inspiration is endless, with gorgeous patterns and elegant stitches. You may even be interested in trying to recreate some of what you've seen - but where do you even start?
That's what I'm here to help with today! I've been a textile artist for pretty much my whole life, and I've been focusing on Sashiko for more than ten years now. While I adore and have a great deal of respect for the art, it's worth noting that I am not Japanese, though the tradition of Sashiko is. I would love to share what I know with you, but also encourage you to seek out further instruction from the people with these stitches in their roots. You can find some of my favourite books on the subject (from both Japanese and non-Japanese authors) here.
So... What is Sashiko, anyway? In short, it's an ancient Japanese art that goes back hundreds of years. It began in Edo era Japan as a way of reinforcing cloth and making it warmer, particularly because cloth was scarce and expensive. Over time, the process evolved and the patterns became more intricate and beautiful. Today, the Sashiko we see in the Western world is practiced largely for its beauty, and as a form of visible mending.
Disclaimer: this article contains affiliate links, which means if you make a purchase after following a link, I may earn a small commission, at no extra charge to you. I only recommend products that I believe in!
The Tools
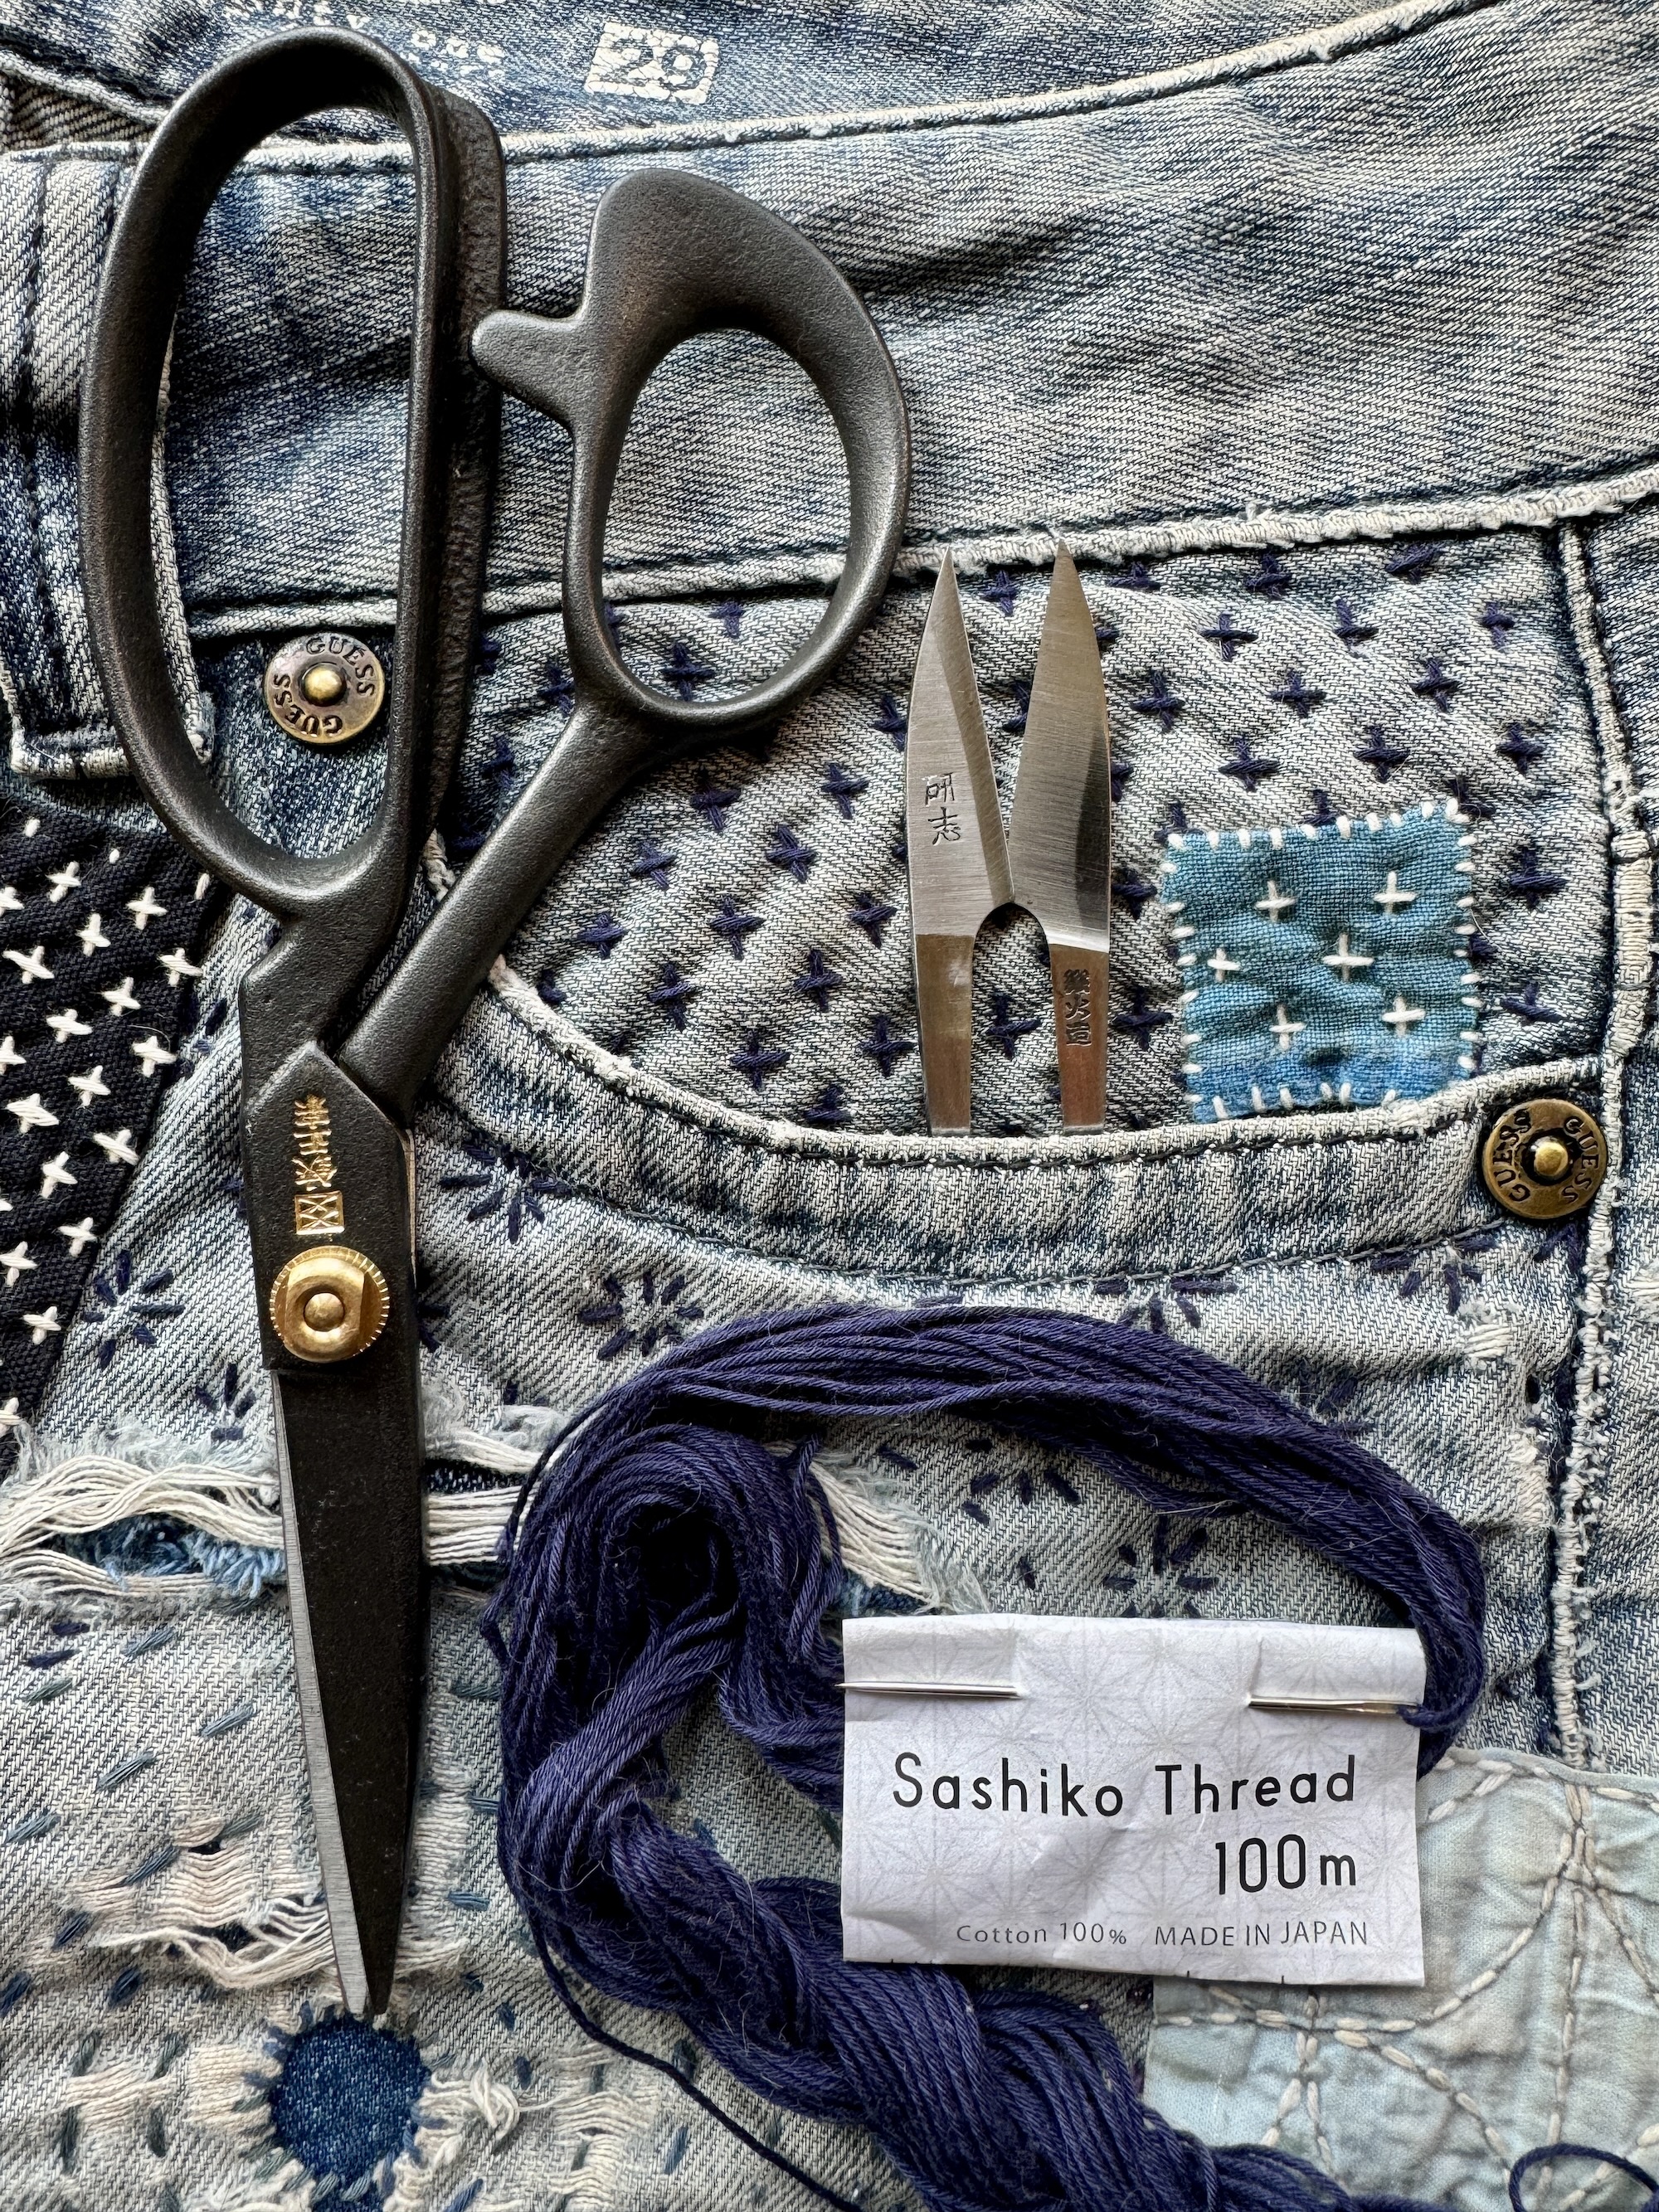
There are only a few key things that you need to start Sashiko-style stitching: a needle, thread, and your fabric. It's also going to help to have a marking tool, a ruler, some scissors, and a palm thimble! You could, in theory, use any old needle and thread, but there are a few things to keep in mind that will make your experience a little smoother.
Needles
There are two key differences between regular sewing needles and Sashiko needles: length, and eye size. Because sashiko uses only running stitch, the needles are designed to gather a number of stitches on the needle at once. There are still different sizes of sashiko needles, and it's up to you to find which length you're the most comfortable with. Typically, longer needles are used for stitching patterns with lots of straight lines, and shorter needles are used for stitching lots of curves.
The size of the eye is also important, because you want to be able to fit your thread through! Sashiko thread is much thicker than regular sewing thread - it's more like embroidery thread or pearl cotton, but we'll get into that soon - so you want a needle that's relatively easy to thread with thicker thread.
If you can't find Sashiko needles: darning needles and crewel embroidery needles offer large eyes, are a good size for sashiko, and usually have a very sharp point!
My favourite needles: I like these ones from Olympus.
Threads
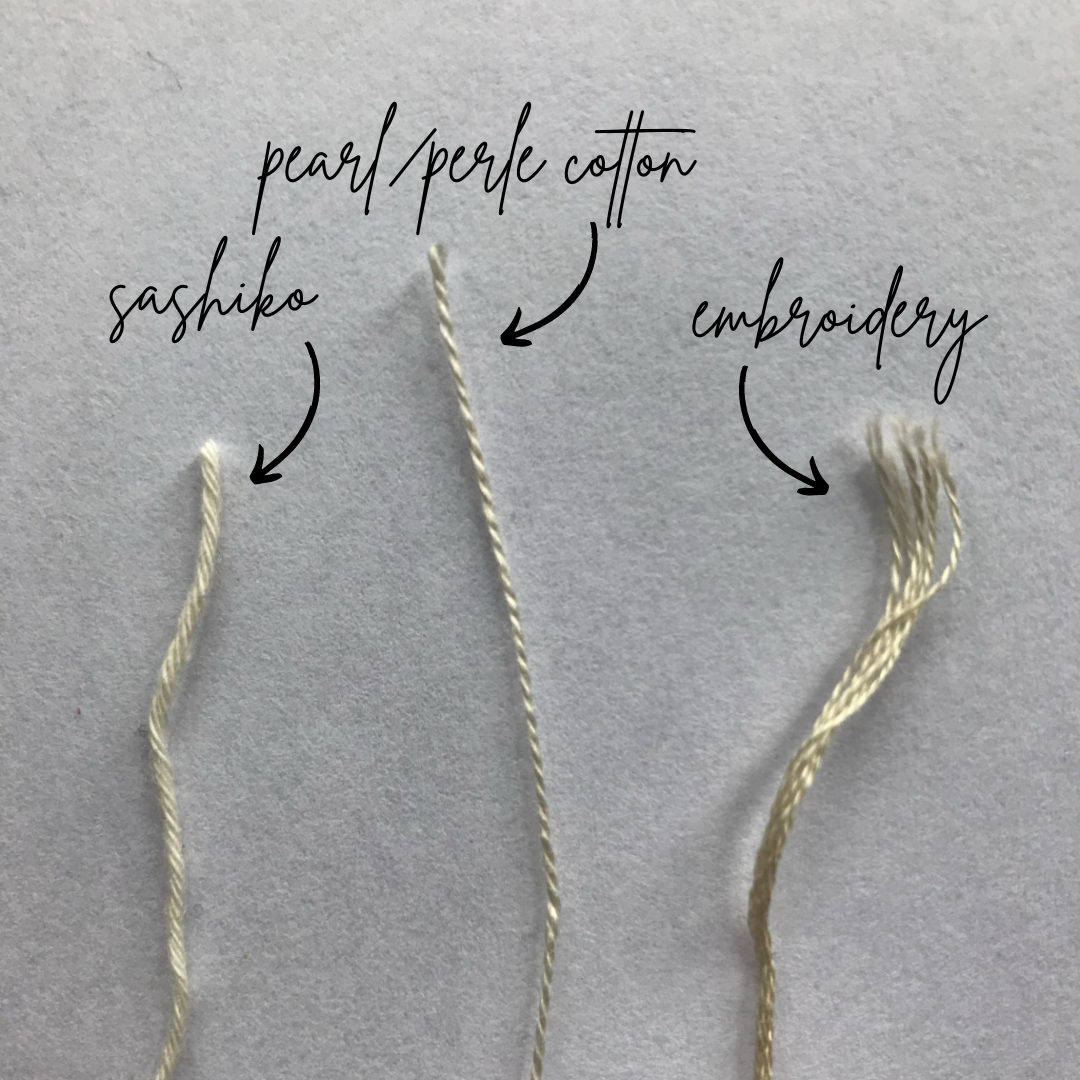
As you might guess, sashiko thread is my preferred option for sashiko stitching, and it's what I use when I stitch. It has a lot of twist which makes it quite strong, and it is not meant to be pulled apart like embroidery floss. The strength and durability of this type of thread makes it ideal for sashiko, especially for repairing high-wear areas.
Sashiko thread can come in different thicknesses, which can be good for different projects. For instance, in situations where you want nice plump stitches, you might opt for a thicker thread. If you have a project with many stitches in a small area, a thinner thread may help give your pattern a bit more definition. Personally, I like Olympus sashiko threads - they just come in one thickness, and it's kind of the goldilocks of sashiko threads, in my opinion!
If you can't find Sashiko threads: pearl cotton or embroidery floss can be good alternatives. Depending on how thick you like the thread, #8 in the pearl cotton or four strands of the stranded floss is a good place to start.
My favourite threads: This is a great little starter bundle from Olympus!
Fabrics
The key thing to look for in fabric for your stitching is a relatively loose weave. Something like linen, unbleached cotton, muslin, or calico is a great option! You just want something that will allow your threaded needle to pass through without too much resistance - a tighter weave, like quilters cotton, means more resistance, and could mean sore hands for you, which we don't want! You can even try puling your threaded needle through the fabric a few times to test how it feels for you before you start stitching.
If you are using Sashiko to patch a garment rather than for strictly embellishing, you'll want to find a patching fabric that is similar in weight to your garment. This helps to make sure neither the patch nor the garment get distorted when you're stitching, and also helps make sure the garment will still be comfortable to wear once it's patched. Try feeling both fabrics in your hands; if they feel very similar in weight, stretch, and softness, then they should work together.
When it comes to the fiber content of the fabric, it really comes down to personal preference. I tend to opt for natural fibres, like cotton and linen, because they are better for the environment and I like the way the sashiko thread integrates into them, creating additional durability. Another option is to purchase pre-printed fabric designed specifically for Sashiko stitching. This will often be linen, cotton, or sarashi fabric, and it has the pattern drawn for you, so all you have to do is stitch!
If you can't find specific fabrics: You can use just about anything with a loose weave here, but I recommend running a threaded needle through it a few times to make sure it will be comfortable for you.
My favourite fabrics: I usually upcycle, but this looks like a lovely linen!
Other Tools

While your needle, thread, and fabric are the key components to your sashiko stitching, there are a few other tools that will make things much easier for you!
Scissors/cutting tools: You'll need something sharp to cut your fabrics and threads! If you love a product with a story and high quality craftsmanship, I love my grip scissors from Shokunin Store. Or if you have dabbled in sewing before, you may already have a good pair of fabric scissors or even a rotary cutting tool, which would also work!
Rulers: Drawing straight lines is a big part of getting straight and even stitches. A regular school ruler works great, and I like the versatility of a quilting ruler.
Mark makers: You'll want something that can make marks on your fabric that will wash out. There are some great options for heat erasable or water soluble fabric markers and pens, or you can even use kids' washable markers if you're stitching something that will be going through the wash! If you don't have these on hand, you could also use a piece of chalk, a sliver of soap, or just a light lead pencil.
Tip: always test your markers and their washability on your fabric before you start your project to avoid disappointing mishaps!
Thimbles: While this one isn't necessary, it can certainly make your stitching sessions a lot more comfortable. Sashiko thimbles are a bit different to western sewing thimbles in that they sit low on the middle finger, over the palm, rather than on the finger tips.
There are a couple of options for sashiko thimbles, which are also called palm thimbles or coin thimbles. You can get metal versions, or softer leather versions - or you can make one yourself with my free template here >>!
Preparing to Stitch
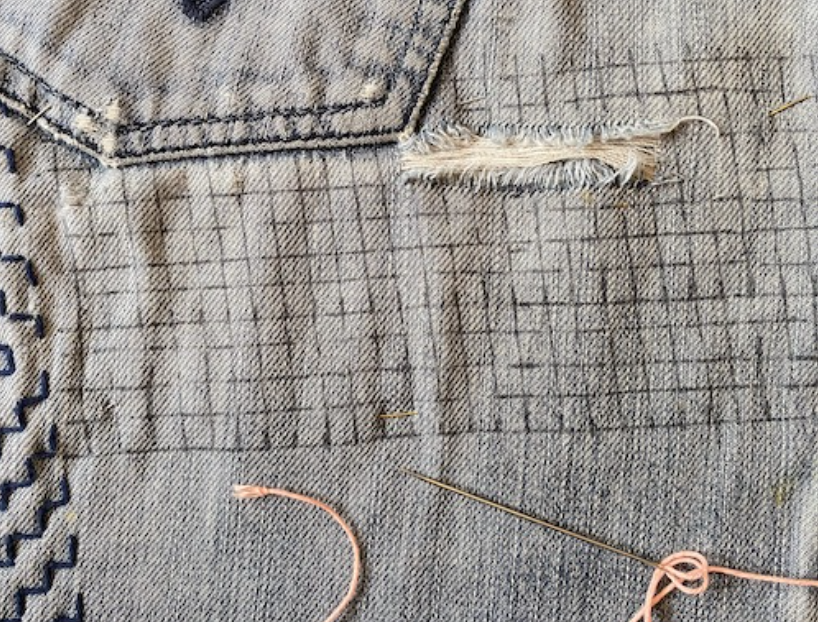
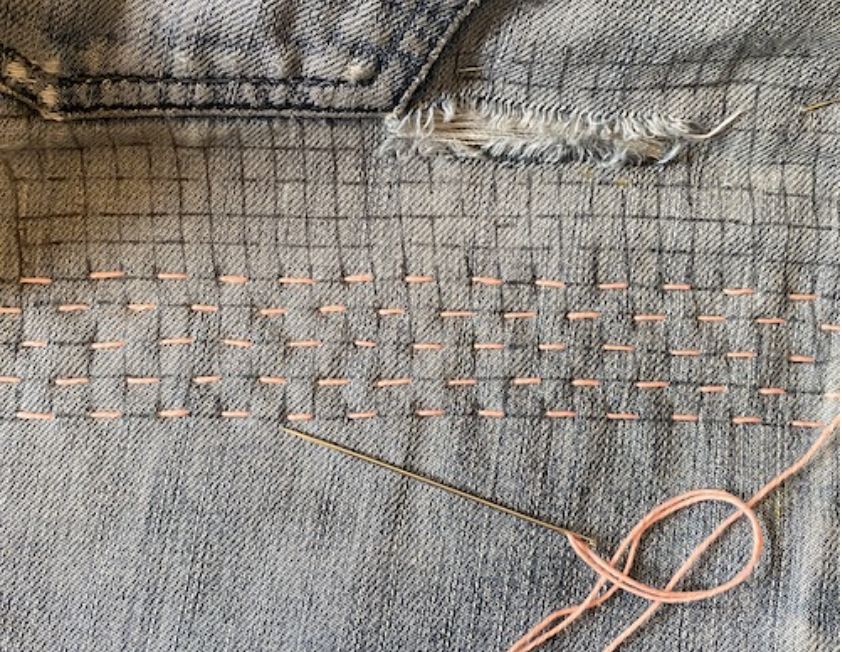
Once you've collected your tools, it's time to start putting them to use by drawing up your pattern. Typically, we're going to start with a grid, often with 1/4" or 1/2cm squares. We'll then use this grid to help us draw out the design we are planning to stitch. Using the grid as a base will help us make sure our stitches are straight and uniform in size later on, and it will help us keep track of where we are when we're drawing out the pattern.
The exact grid we use and what we draw out will depend on the pattern. If you'd like some examples, you can see how to mend with the Jujizashi pattern here, and the Koshizashi pattern here.
Beginning to Stitch
Once we have our grid drawn up and our pattern prepared, all that's left to do is stitch! The order in which we stitch is a bit different to what we may be used to in Western embroidery. Rather than completing all the stitches in one area before moving onto the next, Sashiko is done by stitching all of the horizontal rows first, followed by the vertical rows, and finally any diagonal rows. By stitching this way, our rows of stitching mimic the way the fabric itself is woven, lending additional strength to our work.
Get Started!
There is a lot of information out there about getting started with sashiko, and with all the beautiful, aesthetically pleasing photos of supply kits and tools, it's easy to put off starting until you have the "right" tools and "all" of the information. I hope this has shown you that the tools and process are more accessible than you may think, even if you don't have access to "proper" sashiko supplies.
And if you'd like a handy guide to help you get started, I hope you'll check out my free guide here >>!

