
How to stitch a Hana Fukin
Jan 13, 2021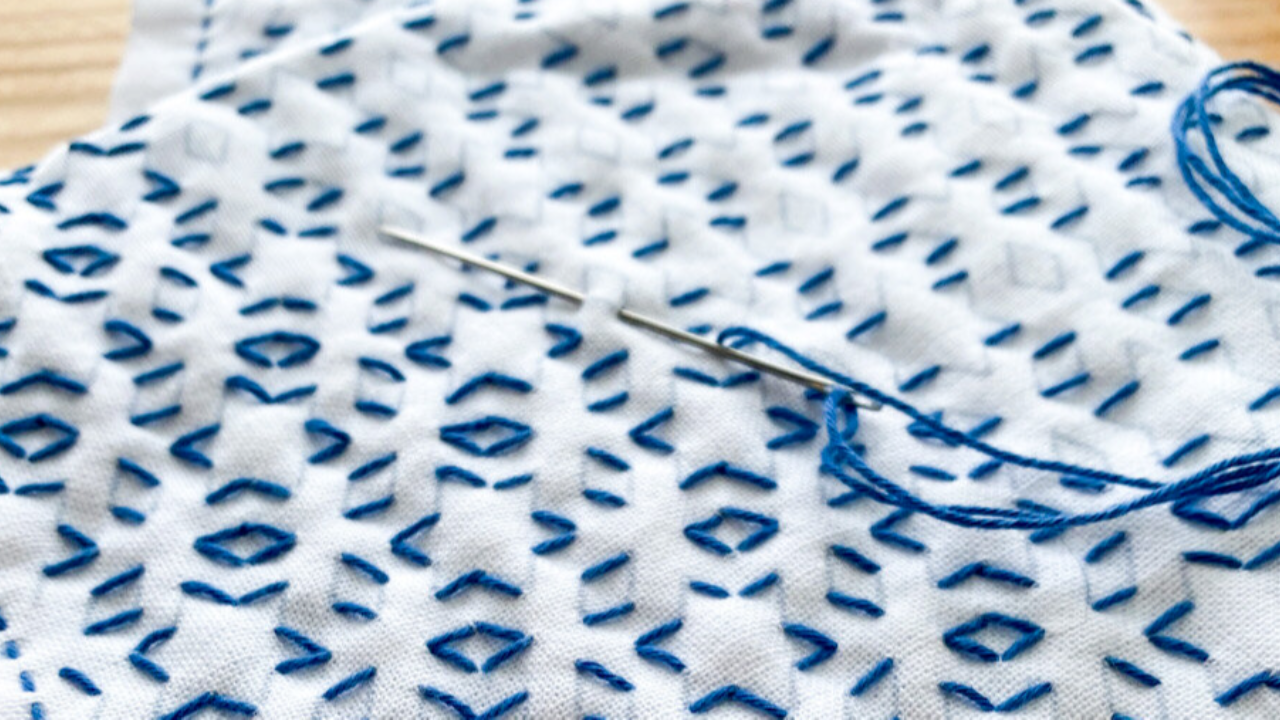
Hana Fukins are a fun way to practice learning sashiko stitches because they are not too big and when you have finished stitching them, they can be admired and used around the home.
I wrote an in depth article about them here, but to summarize, Hana Fukins are beautiful Japanese embroidered fabrics generally for use in the home and kitchen.
Quite often Hana Fukins are sold as a preprinted piece of fabric using ink that washes away in water. These 12 inch square sashiko blocks are great for beginners, for travel or holiday projects.
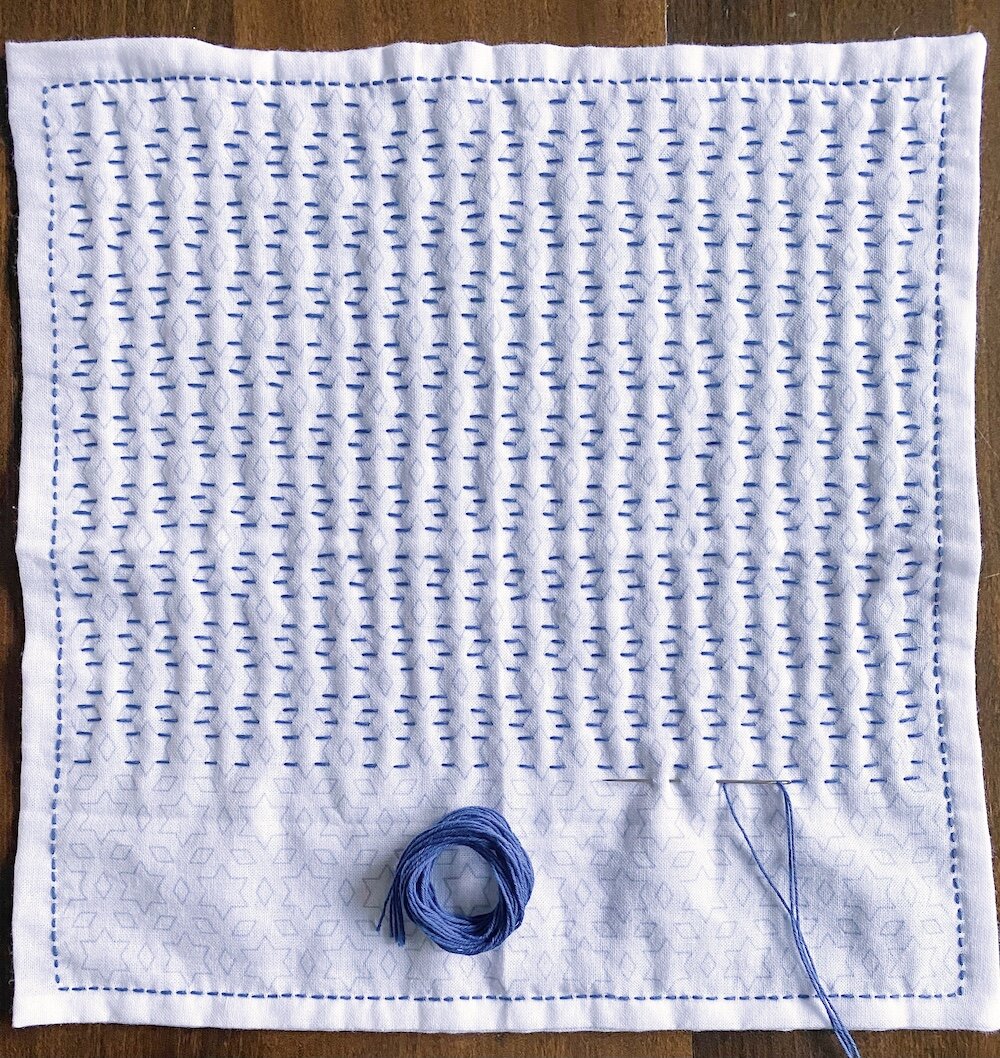
Stitch around the perimeter of the design, then stitch all the horizontal rows.
Step 1.
Please do not iron the cloth or the print may not wash out later! The creases will soften as you stitch and you are going to wash and press after the stitching is done. Do not wash it before you are done, the printed markings will wash away!!
Step 2.
Now you have a choice to make.
The fabric has a 12” printed square and enough unprinted fabric to use for a backing or to make a bag. If you plan to use it for these purposes, you will stitch through only one layer of fabric.
OR
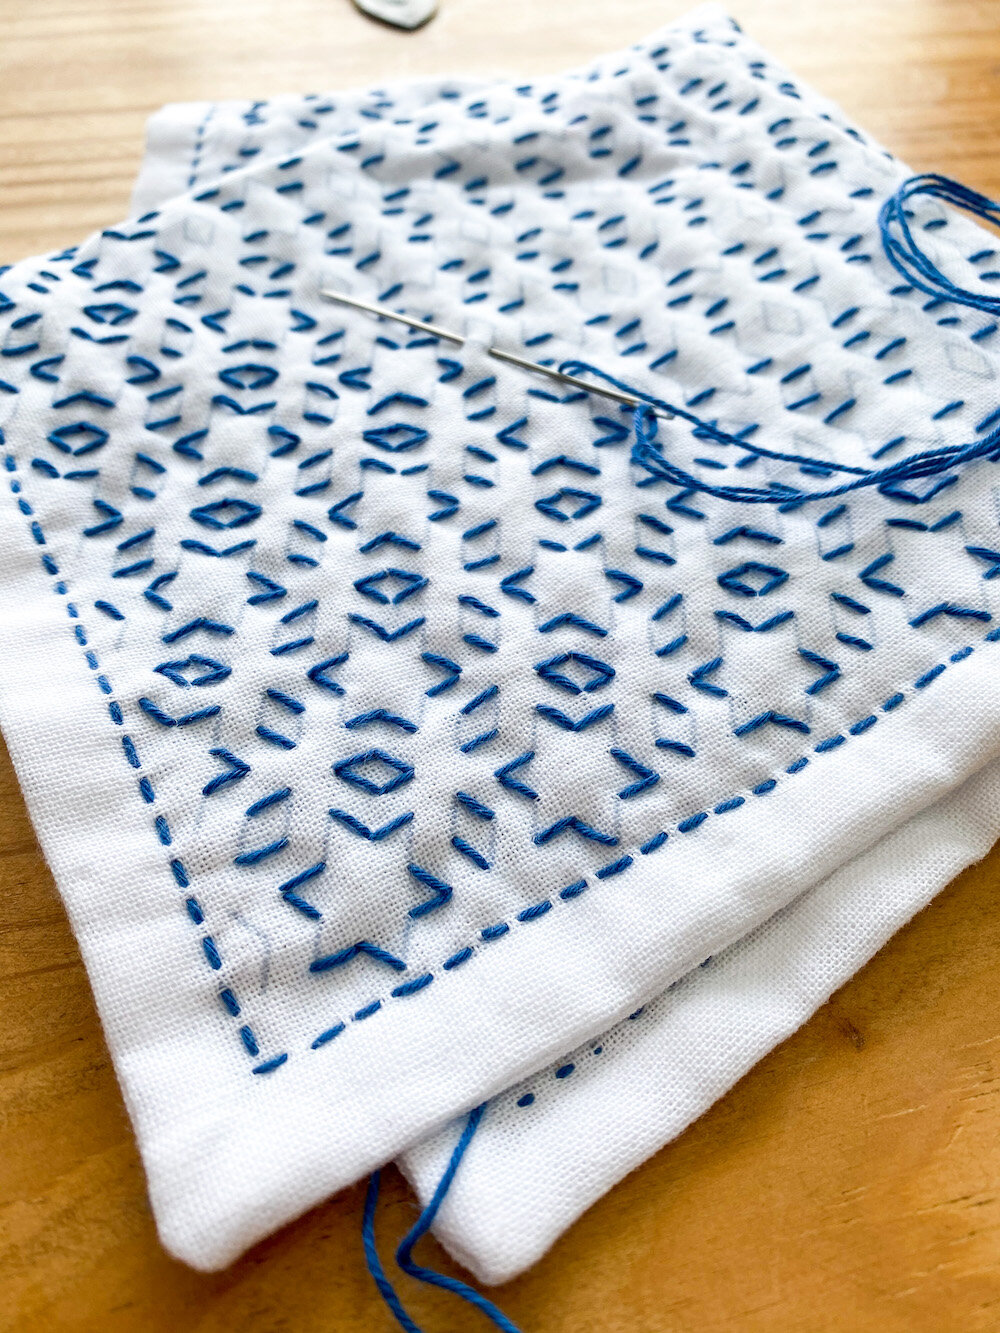
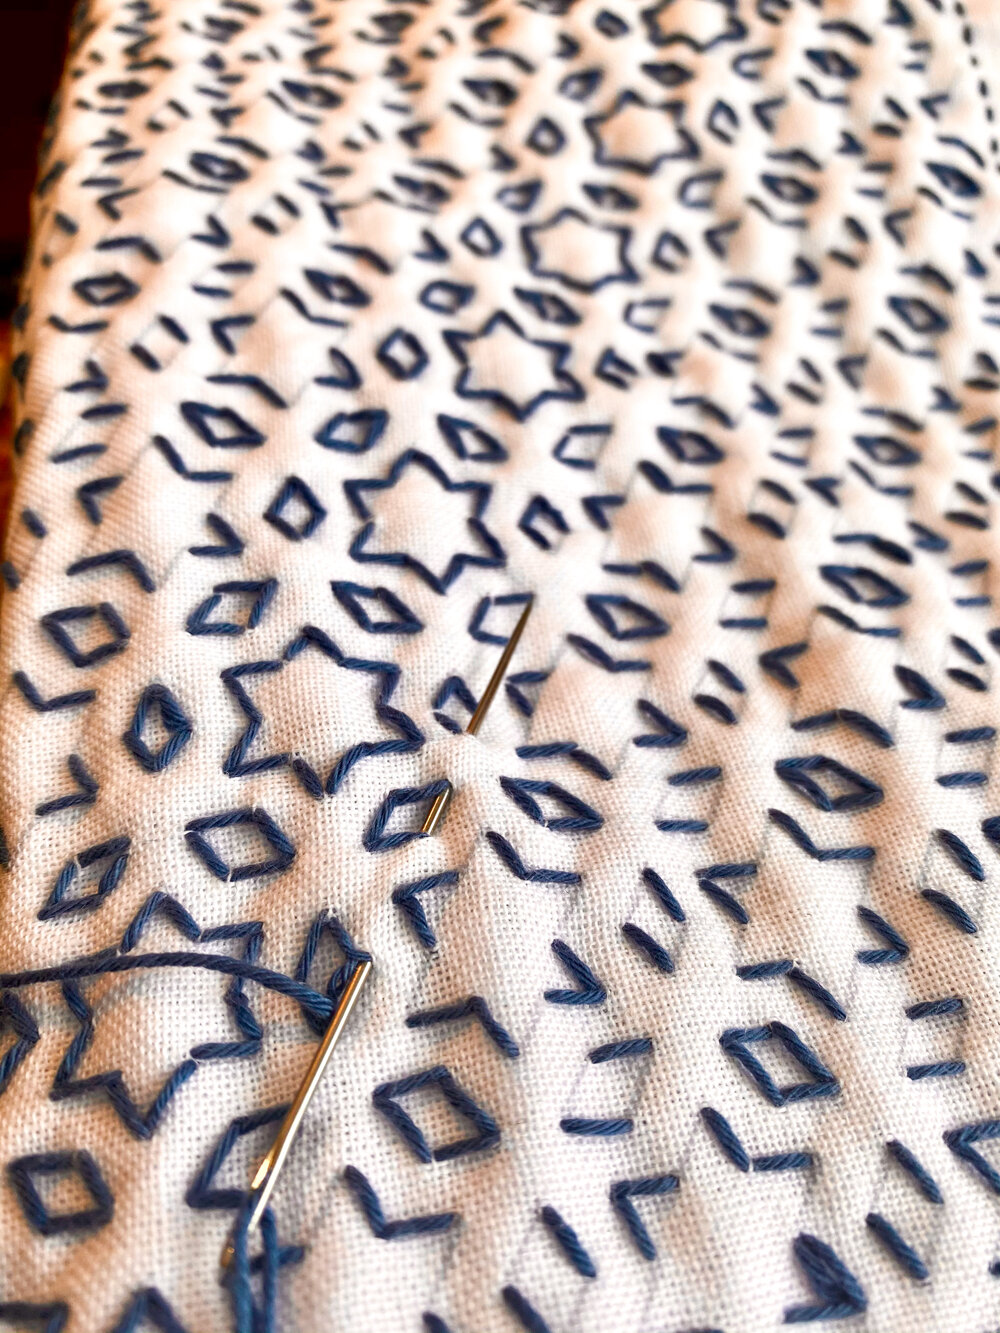
You can fold the unprinted fabric over the back of the printed fabric and stitch through both layers. This will give you a more traditional ‘quilted’ sashiko look. In these pictures I chose to stitch through both layers to get the extra quilted look.
After you have stitched all the verticals, then stitch the diagonals in one direction.
Step 3.
Thread your sashiko needle. Knot the end of your thread. Gather up the sashiko fabric comfortably in your hand, so that you can start stitching at one corner and stitch the outer outline. You are going to put as many stitches as you find comfortable on the needle at a time. THis helps to keep your stitching straight, and makes the stitching go faster.
Having gathered as many stitches as you find comfortable onto your needle, pull the needle through and smooth them out.
Step 4.
Almost all of the traditional sashiko design kits have a little drawing on the front showing what order to stitch the design in. If there isn't a drawing for this, the rule is to stitch the horizontal and vertical lines first, and then the diagonal lines.
Study your design for the most continuous line of stitching so that you carry thread on the back as little as possible. For designs that are not traditional geometric sashiko patterns you can start anywhere you choose.
Then stitch all the diagonals in the opposite direction. You will start to see the completed pattern form.
Step 5.
After the first thread you can end and begin new threads by passing your needle under a few nearby stitches on the back of the fabric. It will stay put without a knot.
Important
As you stitch you must leave some looseness in the thread on the back of your piece. Sashiko stitching tightens up the fabric as your project progresses, it will need that slack to keep it lying flat. Also, sashiko fabrics and threads are cotton and will thicken and shrink with some washing and drying. This is a good thing. It makes the threads plump up like little grains of rice, so pretty, and it creates that traditional ‘quilty’ look over many washings. Even if you stitch through only one layer of fabric, washing will gradually make it prettier.
So, just be sure you leave some slack in the threads on the back, a little loop when you turn a corner, some slack in threads carried from one place to another, the more stitching there is in a design, the more important this will be.
Step 6.
When you have finished stitching the pattern, rinse if in warm water, dry, and press it.
Step 7.
What next?
Use it as a beautiful decorative cloth in your kitchen…..
Or
Sew it into something: a cushion, a drawstring bag, stitch a few and make a runner, stitch a few more and use them as blocks for a sashiko sampler quilt…..
If you’d like to know more:
-
Click here for more visible mending tutorials on YouTube >>
-
Sign up for my newsletter here>> and get a FREE downloadable sashiko style mending guide!
Happy stitching x

